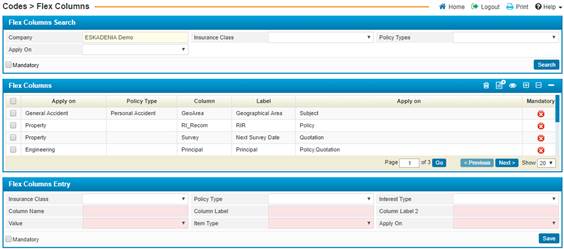
Using the Flex Columns feature of ESKA® Insures – General Insurance, you can create additional fields that will appear at run-time on the interface. You can first define the fields/drop-down list and then go on to define the values that will appear inside this list. These values will all be stored in the database in an area designated for these flexible values;
To add a flex column, click on![]() in
the Flex Columns block. In the Flex Columns Entry block, perform
the following steps:
in
the Flex Columns block. In the Flex Columns Entry block, perform
the following steps:
§ Select the Insurance Class for this flex column. Based on the insurance class you choose, the Policy Type drop-down list will be updated with the relevant values. Select the Policy Type that corresponds to this flex column;
§ Select the Interest Type of the flex column;
§ Enter the Column Name. This is the name that it will be referenced as in the database;
§ Enter in the Column Label. This is the label that will appear next to the field in the interface. In the Column Label 2 field, you may enter in the column label in the second language of the system, if so desired;
§ Select the Value of the flex column; either ‘Entry’, ‘List of Values’ or ‘Values’. If the selected Value was of type “List of Values”, then you need to enter the SQL Query for obtaining this list from the system’s DB. If the selected Value was of type “Values”, then you need to specify the exact values;
§ Select the Item Type; either ‘Number’, ‘Char’, or ‘Date’. This is the type of value that will be inserted by the user and stored in the database;
§ In the Apply On choose one of the systems you want this discount to be Applied on;
§ Check-in the Mandatory checkbox if this field will appear as a required value on the interface;
§
Once you have finished
entering the necessary data, click![]() .
.